Welcome back to bakesmakesandsaves! If you’re looking for a dessert that’s got incredible crunch, silky creaminess, and that wow factor without the high price tag of trendy store-bought versions, these Dubai-style Pistachio Crunch Bars are it. We’re talking buttery, golden shredded filo (kataifi) layers wrapped around a rich homemade pistachio cream, all finished with a drizzle of chocolate. It’s indulgent, textured perfection—and the best part? Making it at home costs a fraction of what you’d pay for similar treats, especially when you buy ingredients smartly like bulk pistachios and frozen kataifi.
This recipe makes about 12-16 bars, perfect for sharing, gifting, or portioning out for the week. Let’s get baking and saving!
Why This Recipe Saves You Money
Pre-made Dubai-inspired bars or similar desserts can run $5–$10 each (or more for fancy ones). By using affordable kataifi (often under $5 for a pound in the freezer section), bulk nuts, and basic pantry staples, you can create a big batch for pennies per serving. Plus, it’s customizable—no need for expensive add-ins.
Ingredients
For the Kataifi Layers:
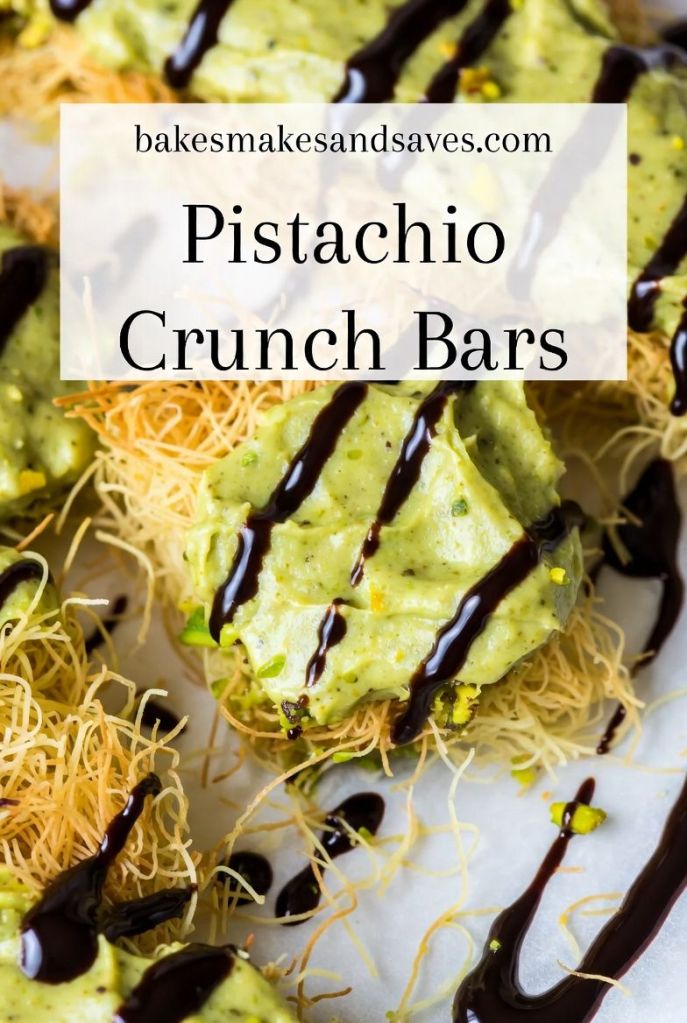
1 package (about 1 lb / 450g) kataifi (shredded filo) dough, thawed (frozen section at international or grocery stores—super budget-friendly!)
1/2 cup (1 stick) unsalted butter, melted (or use margarine for even more savings)
For the Pistachio Cream Filling:
1 1/2 cups shelled pistachios (buy roasted, unsalted in bulk—way cheaper than pre-ground!)
1/2 cup powdered sugar
1/4 cup heavy cream or whole milk (use milk to cut costs)
1 teaspoon vanilla extract
Pinch of salt
Optional: 1-2 tablespoons tahini (adds creaminess without extra cost if you have it)
For Finishing:
4-6 oz dark or milk chocolate, melted (use chocolate chips on sale)
Extra chopped pistachios for topping
Optional: A light brush of honey or simple syrup for shine
Budget tip: Pistachios are the priciest part—grab them on sale or in bulk bins. If needed, mix in some almonds to stretch further while keeping that nutty vibe.
Step-by-Step Instructions
Step 1: Prep the Kataifi
Preheat oven to 350°F (175°C). Line an 8×8 or 9×9 inch baking pan with parchment paper (for easy lift-out and no sticking).
Gently separate the kataifi strands with your fingers—they’re delicate like thin noodles. Place in a large bowl and pour over the melted butter. Toss thoroughly so every strand is coated—this is key for that perfect crisp!
Divide the buttered kataifi into two equal portions.
Step 2: Make the Pistachio Cream
Pulse the pistachios in a food processor until finely ground (stop before it becomes butter!). Add powdered sugar, cream/milk, vanilla, salt, and tahini if using. Blend until smooth and spreadable—like a thick nut butter. Taste and add more sugar if you want it sweeter.
This homemade cream is fresher and cheaper than store-bought pistachio spreads.
Step 3: Assemble and Bake
Press half the kataifi firmly into the bottom of the pan for a solid base.
Spread the pistachio cream evenly over it—get it right to the edges!
Top with the remaining kataifi, pressing gently but leaving some fluffy strands for extra crunch on top.
Bake 25-35 minutes until deeply golden and crispy. The top will look beautifully toasted—watch the edges so they don’t over-brown.
Cool completely in the pan (this helps it set).
Step 4: Finish and Cut
Drizzle melted chocolate over the top, sprinkle with extra chopped pistachios, and let it set (pop in the fridge for 15-20 minutes for clean cuts).
Lift out using the parchment and slice into bars.
Pro tip: For cleaner slices, chill fully first. These hold their crunch at room temp for days!
Tips and Variations for Maximum Savings and Flavor
DIY kataifi hack: Can’t find it? Thinly shred regular filo sheets with a sharp knife or pizza cutter—it’s a great low-cost workaround.
Make it lighter: Use milk instead of cream in the filling, and skip chocolate for a honey drizzle.
Flavor boosts: Add a dash of cardamom or rose water to the cream for a fancy twist without extra expense.
Portion and store: Cut into smaller pieces for grab-and-go treats. Store in an airtight container at room temp for 3-4 days (crunch stays!) or freeze for weeks—perfect for avoiding waste.
Bulk buy wins: Eggs, flour, butter, and nuts in larger quantities mean more bakes for less. This recipe uses staples you’ll reuse!
These bars deliver that addictive crispy-creamy contrast everyone loves, all while keeping your wallet happy. It’s homemade luxury at its best—impressive enough for guests but easy enough for any day.
Try it out, snap your results, and share how you saved! What’s your go-to way to enjoy pistachios?
Happy baking, making, and saving!